|
|
||
|---|---|---|
| .vscode | ||
| cmake | ||
| images | ||
| include | ||
| misc | ||
| scripts | ||
| src | ||
| .clang-format | ||
| .gitignore | ||
| .gitlab-ci.yml | ||
| CHANGELOG | ||
| CMakeLists.txt | ||
| CODEOWNERS | ||
| doxygen.conf | ||
| LICENSE | ||
| README.md | ||
| suppressions.txt | ||
| winegui.code-workspace | ||
WineGUI
At last, a user-interface friendly Wine (A compatibility layer capable of running Windows applications under Linux) Manager.
Download
You can find the latest version on the Releases page of GitLab.
Download the WineGUI package you require for your Linux distribution (we provide .deb, .rpm and .tar.gz files). Typically you should use .deb file for Ubuntu and Linux Mint distros.
Install the package and you are ready to go! WineGUI should be listed in your menu.
Features
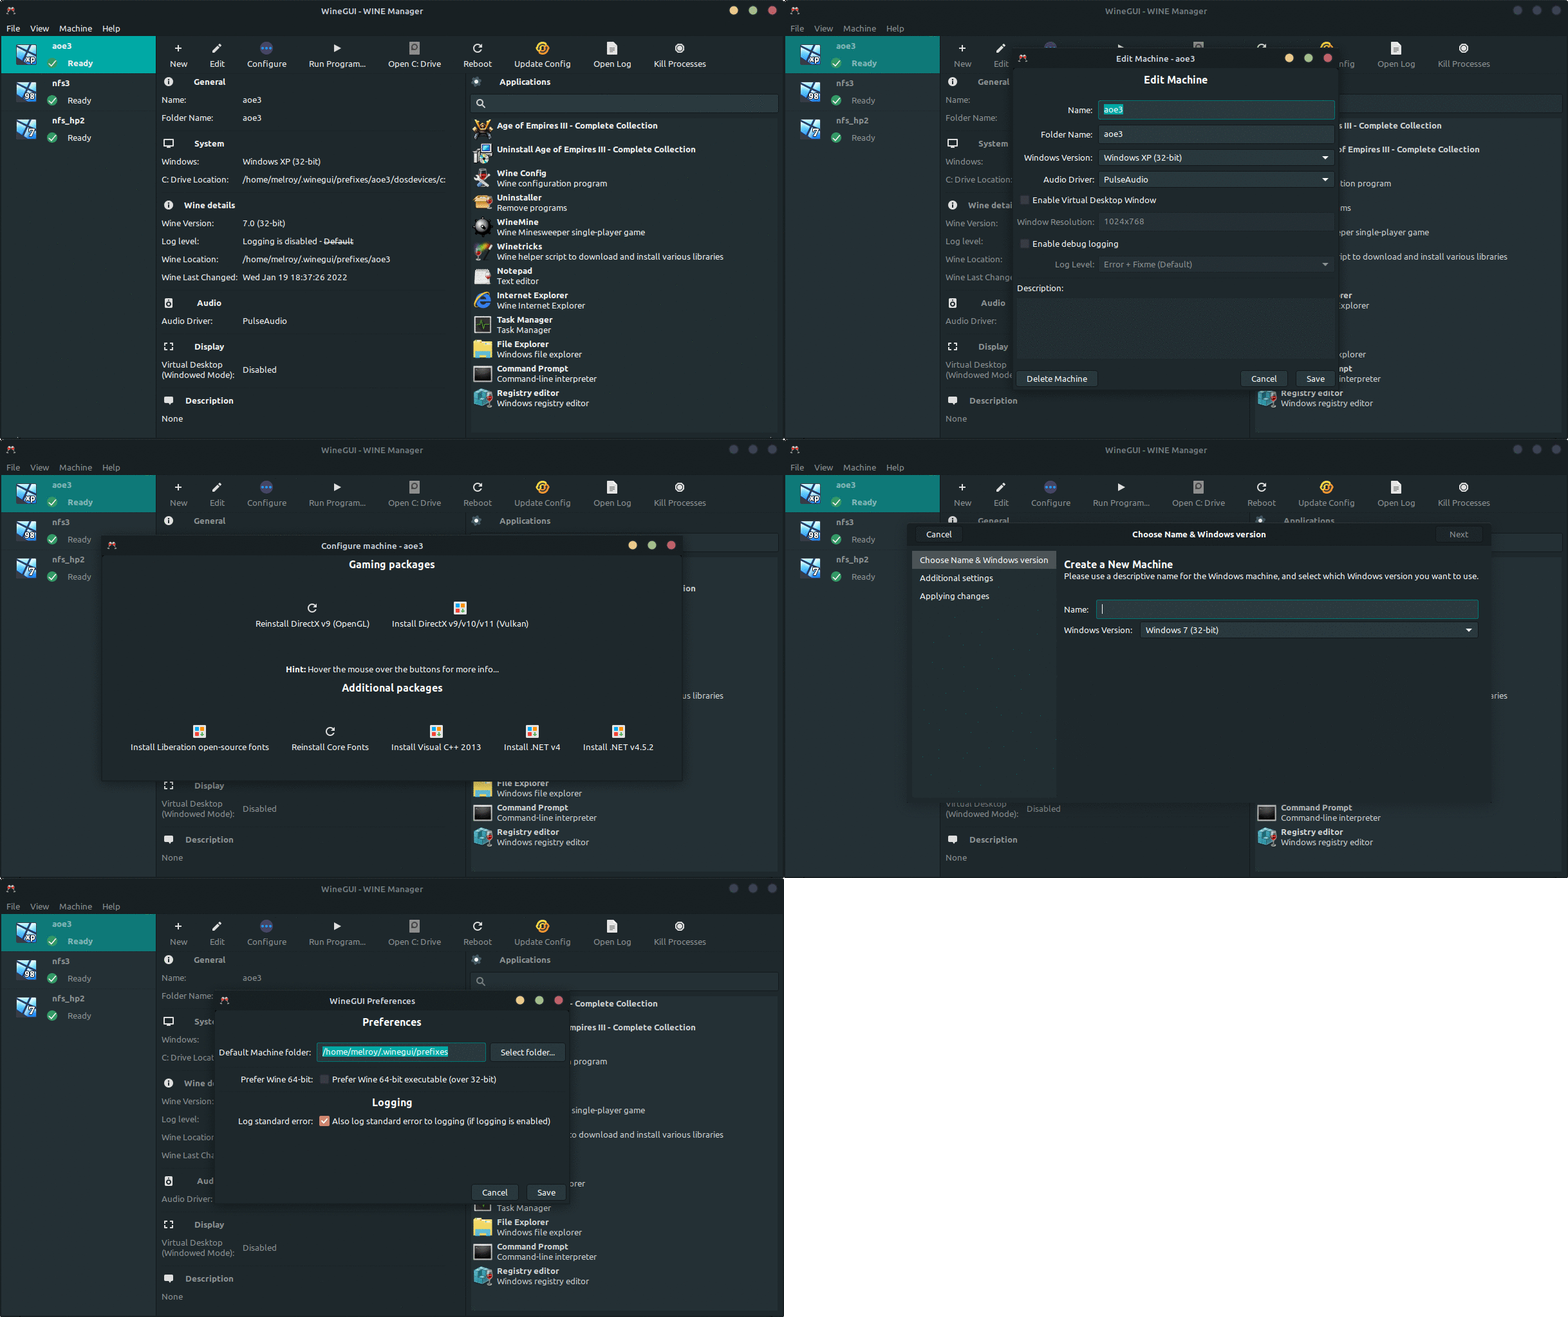
- Graphical user-interface on top of Wine
- Creating a new machine using an easy step-by-step wizard
- Application list per machine (with search feature and refresh button)
- Editing, removing and cloning Windows machines in a breeze
- Configure window installing additional software with just a single click (like installing DirectX)
- One-button click to run a program, open the
C:drive, simulate a reboot or kill all processes
GitHub Star History
Development
WineGUI is created by using GTK3 toolkit (Gtkmm C++-interface) and C++ code.
Development has been done in VSCcodium, using the following extensions:
- C/C++
- CMake
- CMake Tools
- GitLab Workflow
Documentation
See latest WineGUI Developer Docs.
Requirements
Dependencies should be met before build:
- gcc/g++ (advised: v8 or later)
- cmake (advised: v3.10 or later)
- ninja-build
- libgtkmm-3.0-dev (implicit dependency with libgtk-3-dev)
- libjson-glib-dev
- pkg-config
Optionally:
- Ccache (optional, but much recommended)
- doxygen
- graphviz
- rpm
- clang-format (v14)
- cppcheck (v2.10 or higher)
Hint: You could execute ./scripts/deps.sh script for Debian based systems (incl. Ubuntu and Linux Mint) in order to get all the dependencies installed automatically.
Build
Run script: ./scripts/build.sh
Or execute:
# Prepare
cmake -GNinja -B build
# Build WineGUI
cmake --build ./build
Building from source
Building from the source code archive files (eg. tar.gz) is just as easy, however sure to download the specially prepared WineGUI-Source-*.tar.gz archive file (instead of the GitLab generated source archives).
This WineGUI source archive contains the version.txt for you already, so the tarball is aware of the project version during the build.
Alternatively, you can set the version yourself. Either by introducing a version.txt file in the root directory or set the option flag: -DCUSTOM_PROJECT_VERSION to the version you want, for example:
cmake -GNinja -B build -DCUSTOM_PROJECT_VERSION:STRING="1.0.0"
Then execute the build using cmake as shown earlier.
Run
Execute: ninja -C build run
Or execute the binary directly:
./build/bin/winegui
Rebuild
Configuring the ninja build system via CMake is often only needed once (cmake -GNinja -B build), after that just execute:
cmake --build ./build
Or just: ninja within the build directory.
Clean the build via: ninja clean.
Hint: Run ninja help for all available targets.
Debug
You can use the helper script: ./scripts/build_debug.sh
Start debugging in GDB (GNU Debugger):
cd build_debug
gdb -ex=run bin/winegui
Memory check
First build the (Linux) target including debug symbols. Binary should be present in the build/bin directory.
Next, check for memory leaks using valgrind by executing:
./scripts/valgrind.sh
Or to generate a memory usage plot in massif format, execute:
./scripts/valgrind_plot.sh
Production
For production build and DEB file package, you can run: ./scripts/build_prod.sh
Or use:
cmake -GNinja -DCMAKE_INSTALL_PREFIX:PATH=/usr -DCMAKE_BUILD_TYPE=Release -B build_prod

cmake --build ./build_prod --config Release
Build Doxygen
Or build with generated doxygen files locally:
cmake -GNinja -Ddoc=ON -B build_docs
cmake --build ./build_docs --target Doxygen
Releasing
Before you can make a new release, align the version number in WineGUI with the version you want to release. Then create a new tagged version in Gitlab with the same version name.
Note: Only a release tag on the main branch will trigger the publish task.
Automated Clang Format
We use our own Clang LLVM C++ Programming Style Format, using clang-format command.
To automatically comply to our style format execute following script (inplace edits are performed for you):
./scripts/fix_format.sh
Or depend on the docker image instead of your local clang-format:
./scripts/fix_format.sh docker
Check only for errors, run: ./scripts/check_format.sh (same idea with Docker, run: ./scripts/check_format.sh docker to not depend on your local clang-format tool)
Guidelines
First we try to use the Google C++ Style Guide as basis.
Next, we also tend to follow the popular C++ Core Guidelines as much as possible.
CI/CD
For continuous integration & delivery we use our Dockerfile to create a Docker image.
This image (danger89/gtk3-docker-cmake-ninja) is hosted on Dockerhub.
A helper script can be used: ./scripts/build_and_upload_image.sh


